Loan Repayments
There are two ways to add payments to loans. You can go to the loan and make a payment, or you can choose to make bulk repayments. Payments can be entered as they occur, or you can backdate them.
Single Payment
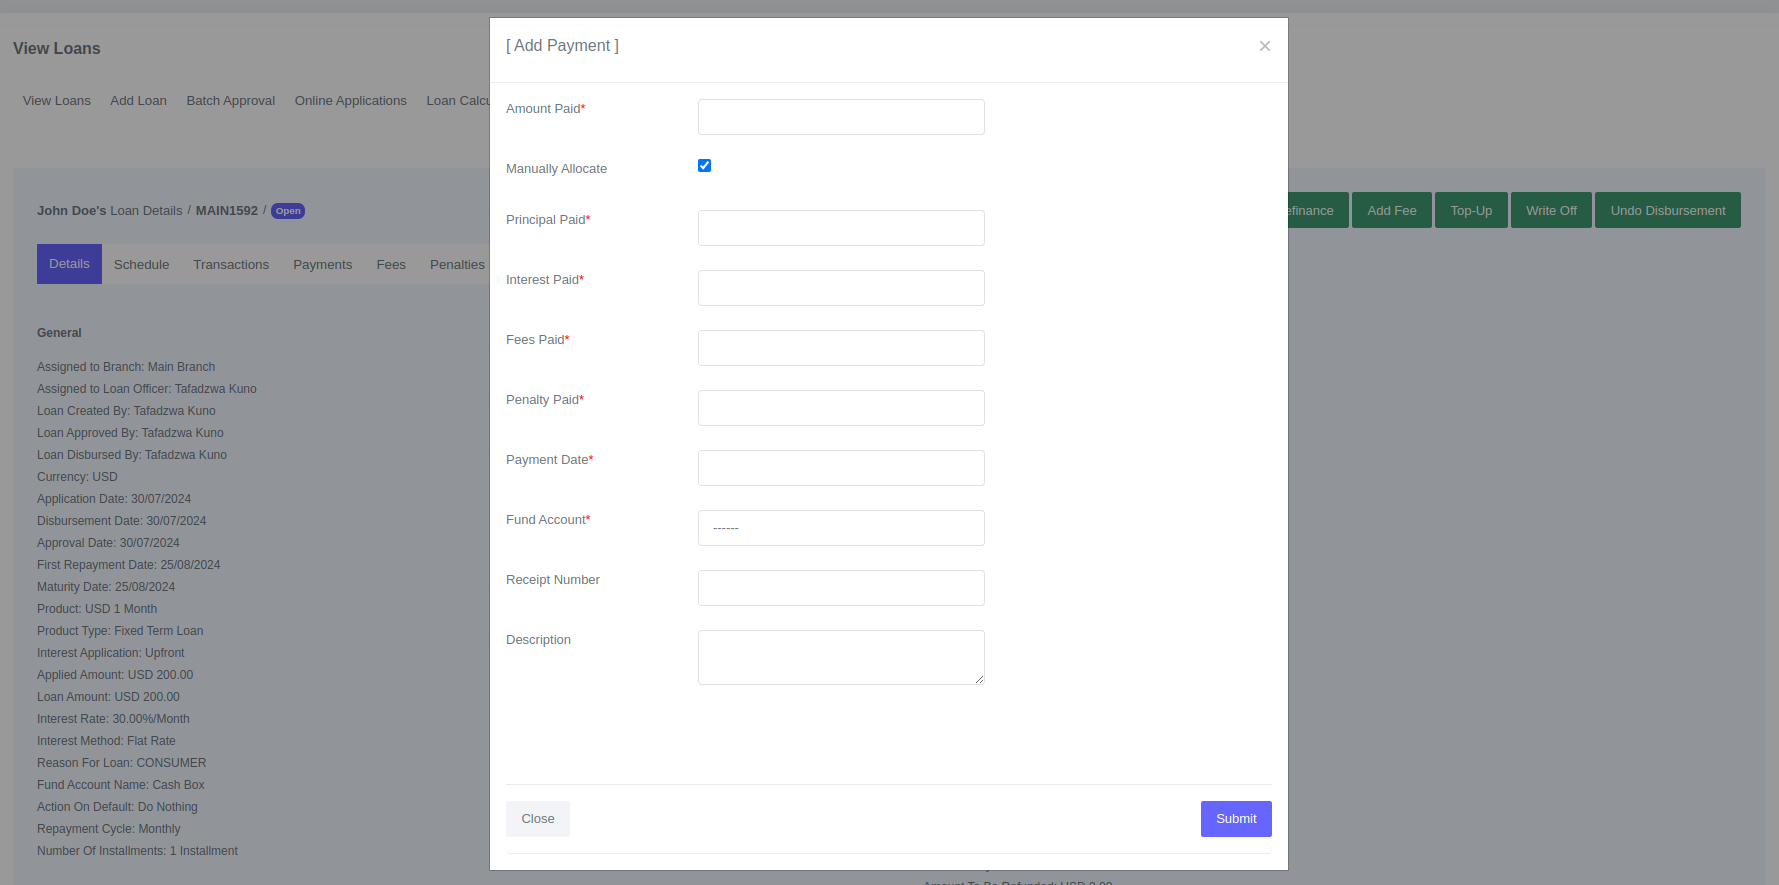
To add a single payment:
- Go to Loans>View Loans.
- Filter the loan you want to add payment to , in the table, you can click on "Loan Number" to open the details of the loan.
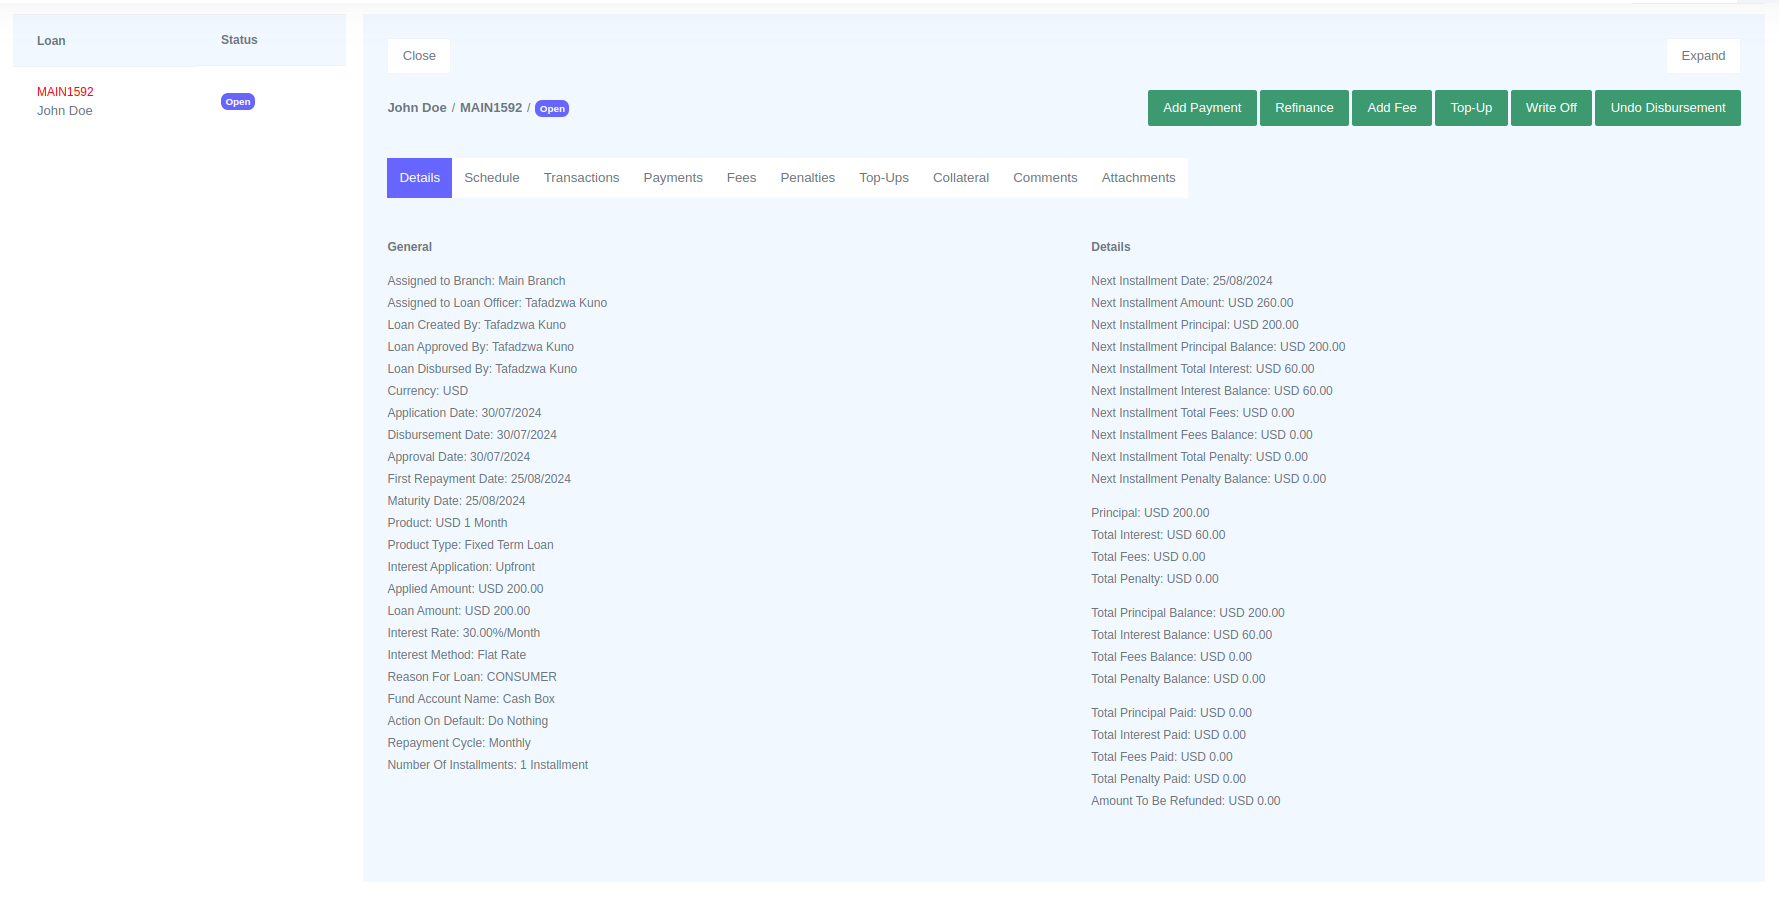
- Click the "Add Payment" button and a form will be opened for you to fill.
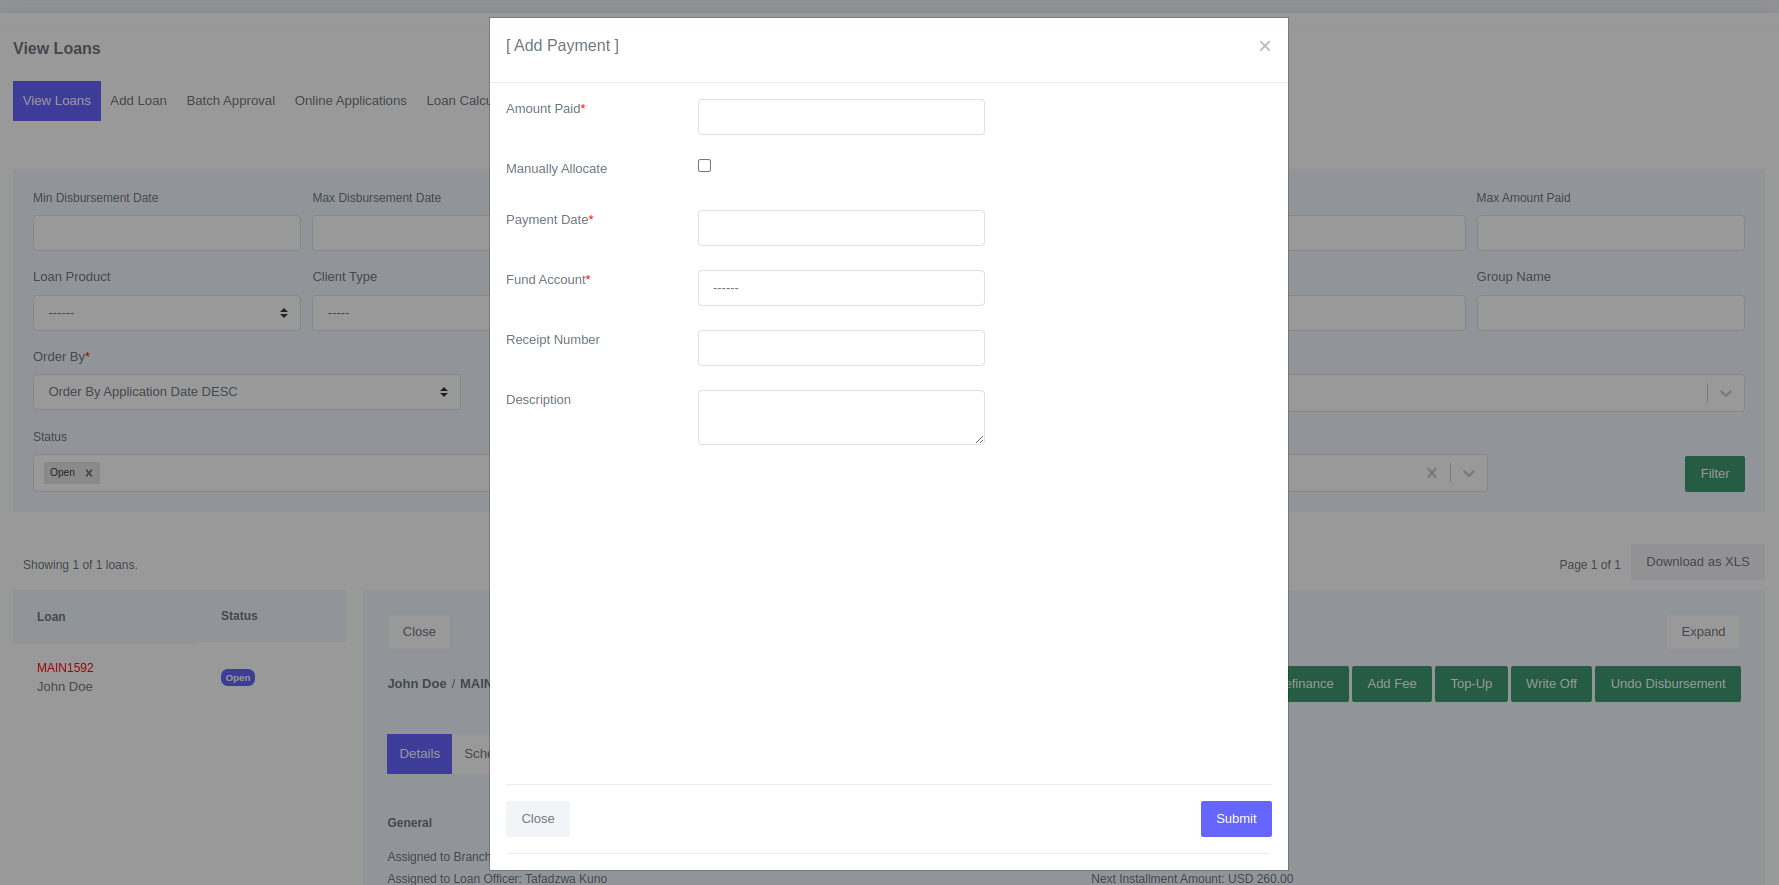
- Click Submit
Fields for Single Payment
| Field | Description |
|---|---|
| Amount Paid | Total amount paid by the client |
| Manually Allocate | Override payment distribution set on the loan product |
| Payment Date | Provide the date on which the payment was received from the client |
| Fund Account | General ledger account that received payment from the client or payment channel. |
| Receipt Number | Payment receipt number recorded |
| Description | Payment description |
When a payment is added to a loan, the loan schedule is updated and the payment is logged in the loan transactions. For example, a payment of US 75 was added to a six-month loan with installments of US 75 each. The loan schedule was updated as follows:
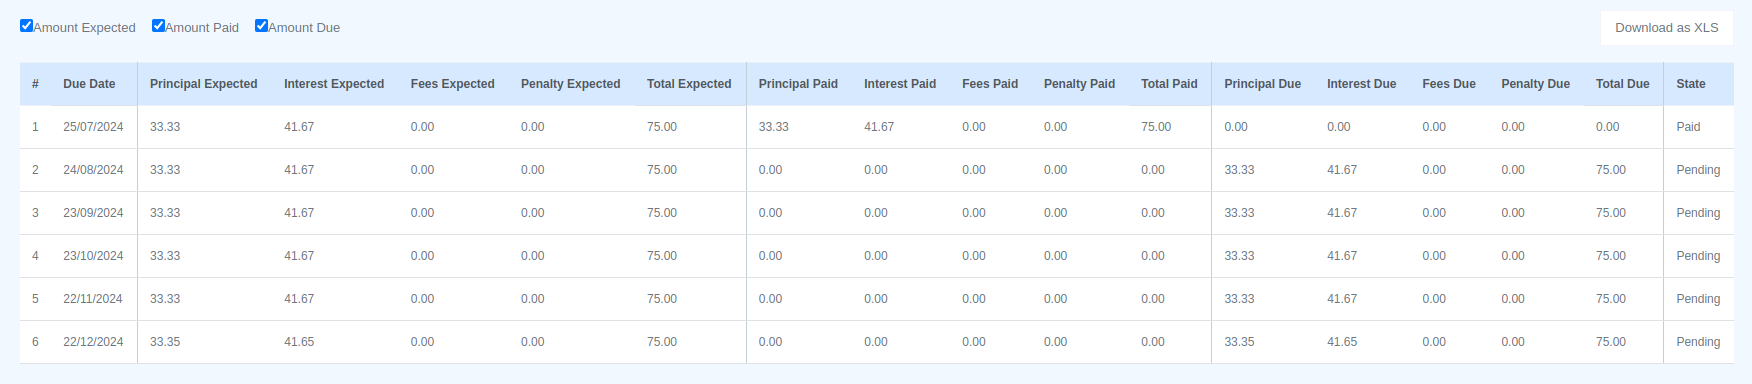
Before the first payment was made on the loan, the first installment on the schedule was similar to the rest of the installments. After the payment the first installment on the loan schedule was updated. The expected columns remained the same as these are used as a reference for how the payment is supposed to be distributed on the installment.
The paid section was updated to show the distribution of the payment on the schedule. Before the payment, the paid section had zeros. Of the US $75 that was paid, US $33.33 was allocated to principal and US $41.67 was allocated to interest. Fees and penalty remained the same because the expected values were zeros. The total paid was updated to US $75.
The due section was also updated. Before the payment, the principal due was US$33.33, the interest due was US$41.67, and the total due was US$75. Since the payment covered all principal and interest due, the due amounts were updated to zeros, meaning that on the first installment there is no due amount.
The status of the first installment was also updated to Paid.
Manually Allocate Payment
When a payment is made, it is distributed among principal, interest, penalty, and fees. The repayment order is set on the loan product. For more information about repayment order, see Decimal Places, Rounding Off and Repayment Order section under loan product creation. It is possible to override and manually allocate the payment starting with your preference.
To manually allocate a payment, click the "Manually Allocate" checkbox on the "Add Payment" form.
Enter the payment distribution that you would like to be applied to the loan. The payment distribution sum should equal the total amount paid. Click submit to add the payment.
Backdate repayments
When adding a payment, the user should enter the payment date, which is usually the day the payment was made. If all payments are updated on time, the payment date entered should be the same as the calendar date of the day.
When you backdate a payment, you enter a date in the past as the payment date. The collection date will be the same as the payment date, and the date recorded will be the date the payment was entered in the system. You can view the details of each payment on the loan profile under the "Payments" tab.
Bulk Repayments
You can upload bulk payments using excel spreadsheets in the system. Go to Payments>Upload File.
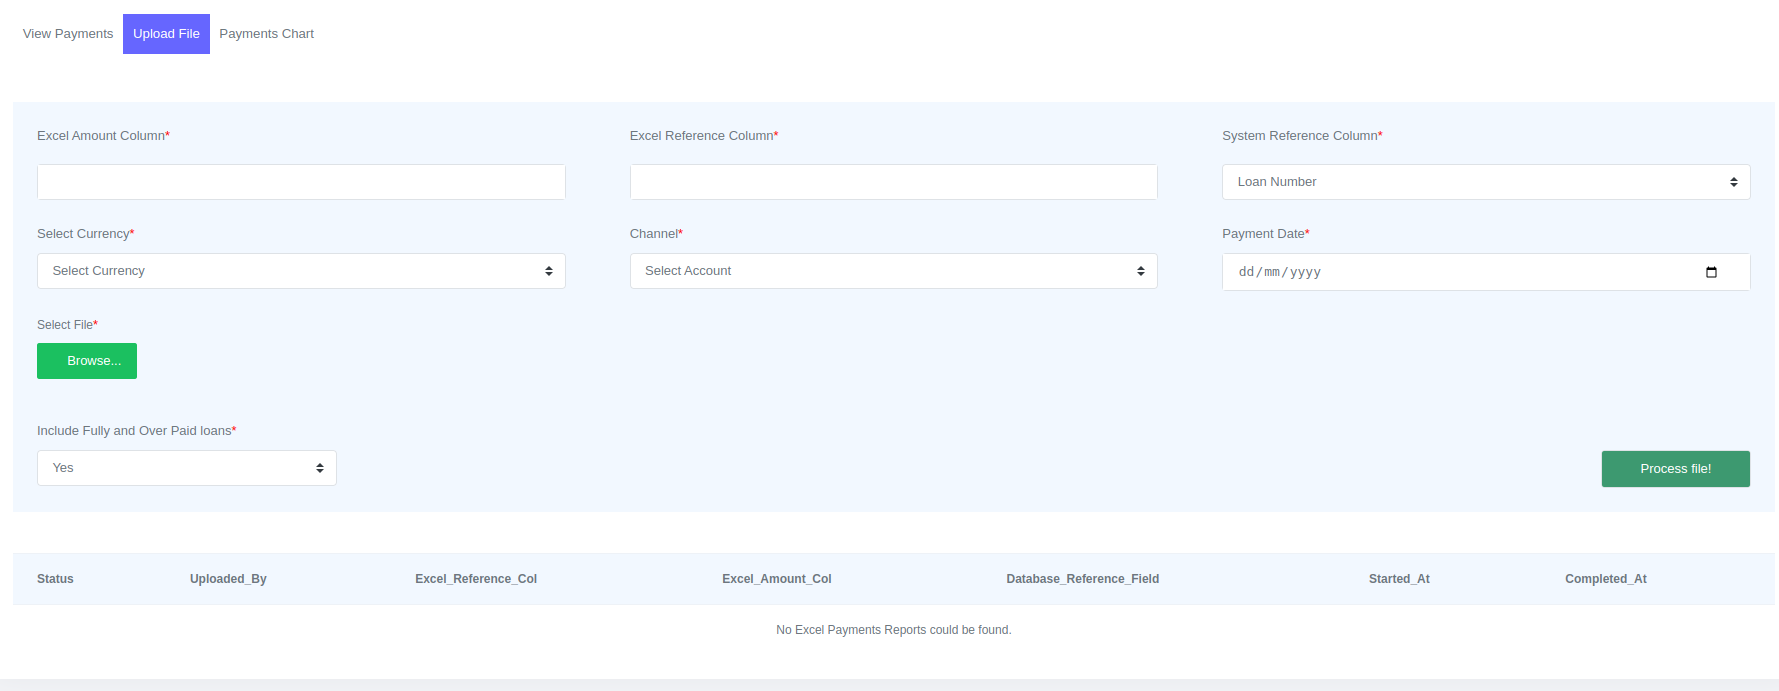
To process bulk payments follow the following steps.
- Excel Amount Column - Enter the excel amount column on this field as it is on the excel spreadsheet.
- Excel Reference Column - Enter the excel reference column on this field as it is on the excel spreadsheet. This field will be used to match payments to loans. It will refer to a field in the system.
- System Reference Column - The system reference column is a field in the system that is referred to by the Excel reference column. This field is used to match payments on the Excel spreadsheet with the loans in the system. It is a select field with three options which are Loan Number, Client Number and Client ID Number. If Client Number or Client ID Number are selected, the Start with select field will be displayed. This field has two options: Start with Oldest Loan and Start with Newest Loan. These fields configure the system on which loan to add payments first if a client has multiple open loans.
- Select Currency - Select the currency of payments being added.
- Channel - Select the general ledger account involved in making payments.
- Payment Date - Date of payments.
- Select File - Click browse to upload the payments excel spreadsheet. Click on upload to upload.
- Include Fully and Over Paid loans - Include loans that are fully paid or overpaid when updating payments or exclude them.
Once all the fields are updated click process file to update payments.
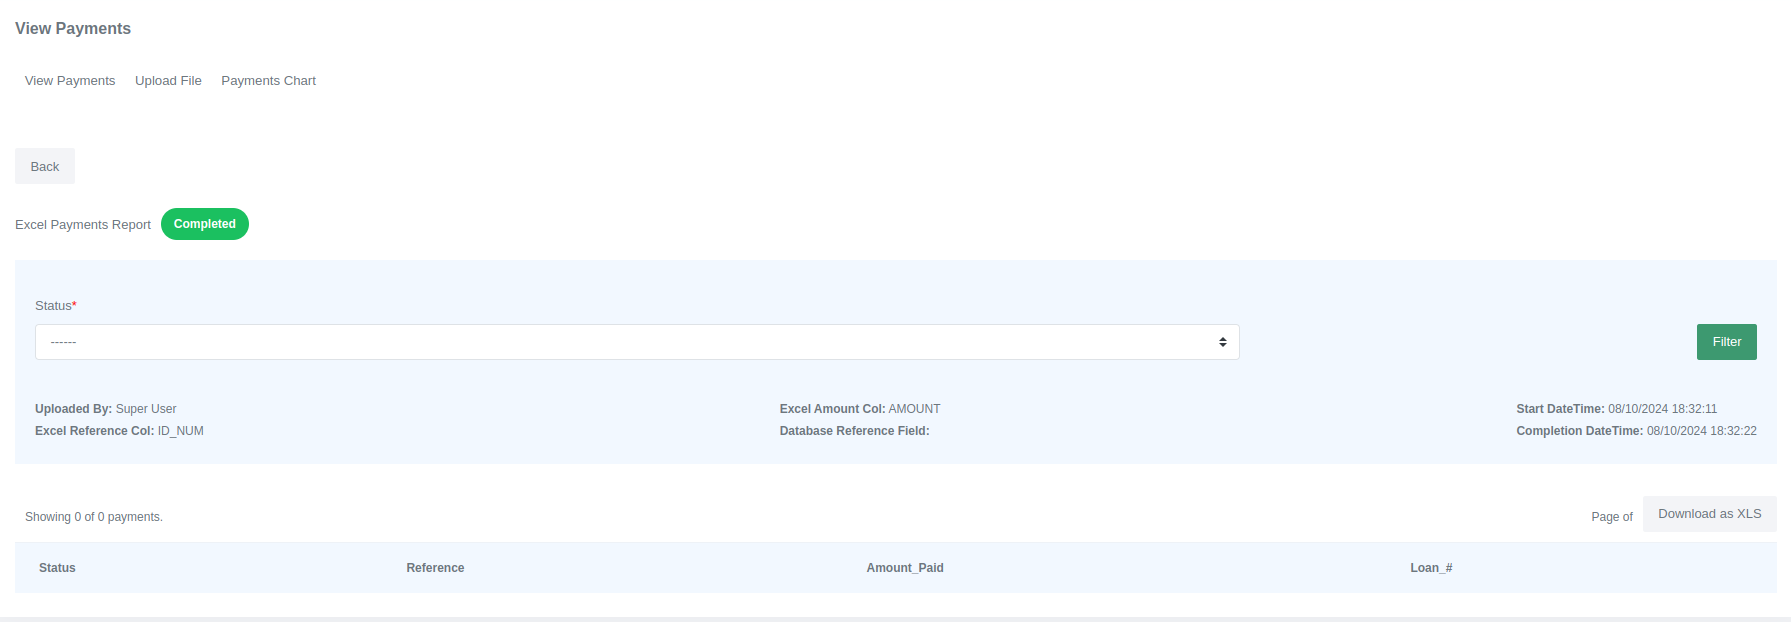
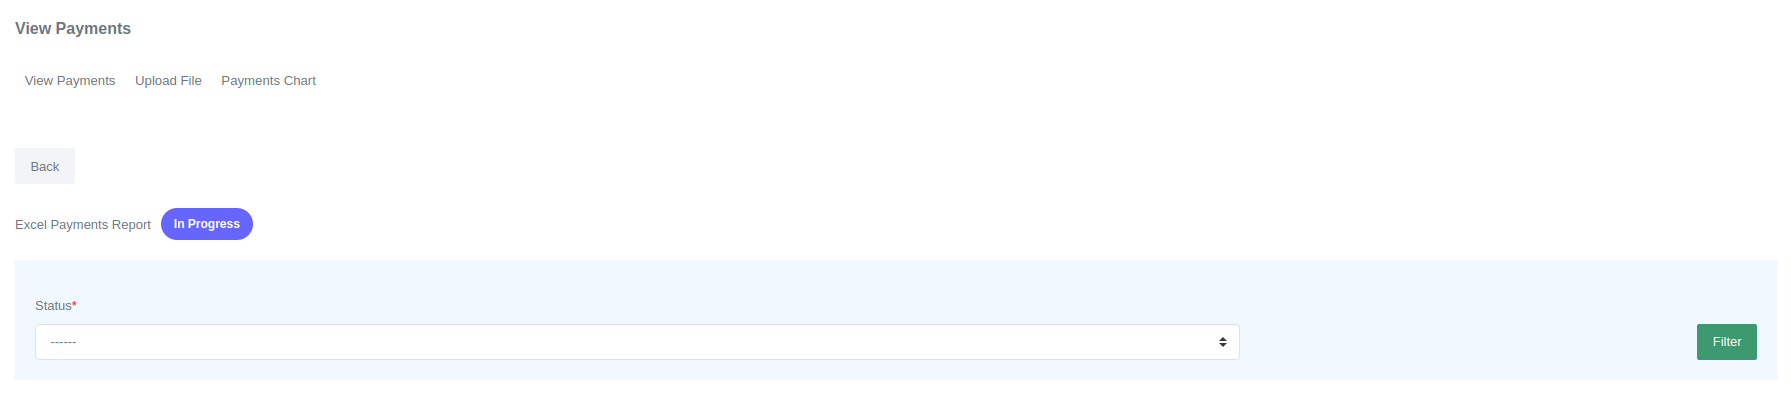 The system will show the Excel payments report with a status of "In Progress." After a few seconds, you can refresh the browser to check if the payments were successfully uploaded. If the upload was successful, the system will display the report with information about the upload. You can filter on Status to view a detailed report on failed, paid and over paid payments.