Manage Forms
Custom forms are a powerful and flexible way to extend the functionality of the forms already provided. Manage Forms explains in detail how organizations can use custom forms to meet their specific business needs.
A field is a value associated with a Lenda entity such as a client or loan. Entities include several default fields for storing information such as firstname, middlename, date of birth for client and principal, interest for loan. We refer to the fields we provide by default as native fields.
For client and loan entities, you may create custom fields to capture additional relevant information. Most custom fields are grouped together in custom forms. When it comes to custom fields, it is important to distinguish between the custom field definition and the custom field value. The custom field definition is the blueprint for the custom field value. It defines the data type, the constraints, and the formatting of the custom field value. The custom field value is the actual value that a custom field attached to an entity contains. For example, if the custom field is "Product Name," then the custom field value is the name of the product.
To create, update and delete custom fields and forms the user needs appropriate permissions. For more information, see Roles and Permissions.
Lenda currently supports custom forms and fields on client and loan entities. To add custom fields to client and loan application forms, first create a custom form that holds together custom fields.
Custom form creation
- Go to Admin > Manage Forms.
- To create a custom form for a client entity, click the "Clients" tab, then click the "Add Form" button. To create a custom form for a loan entity, click the "Loans" tab, then click the "Add Form" button.
- A form will be opened for you to fill out.
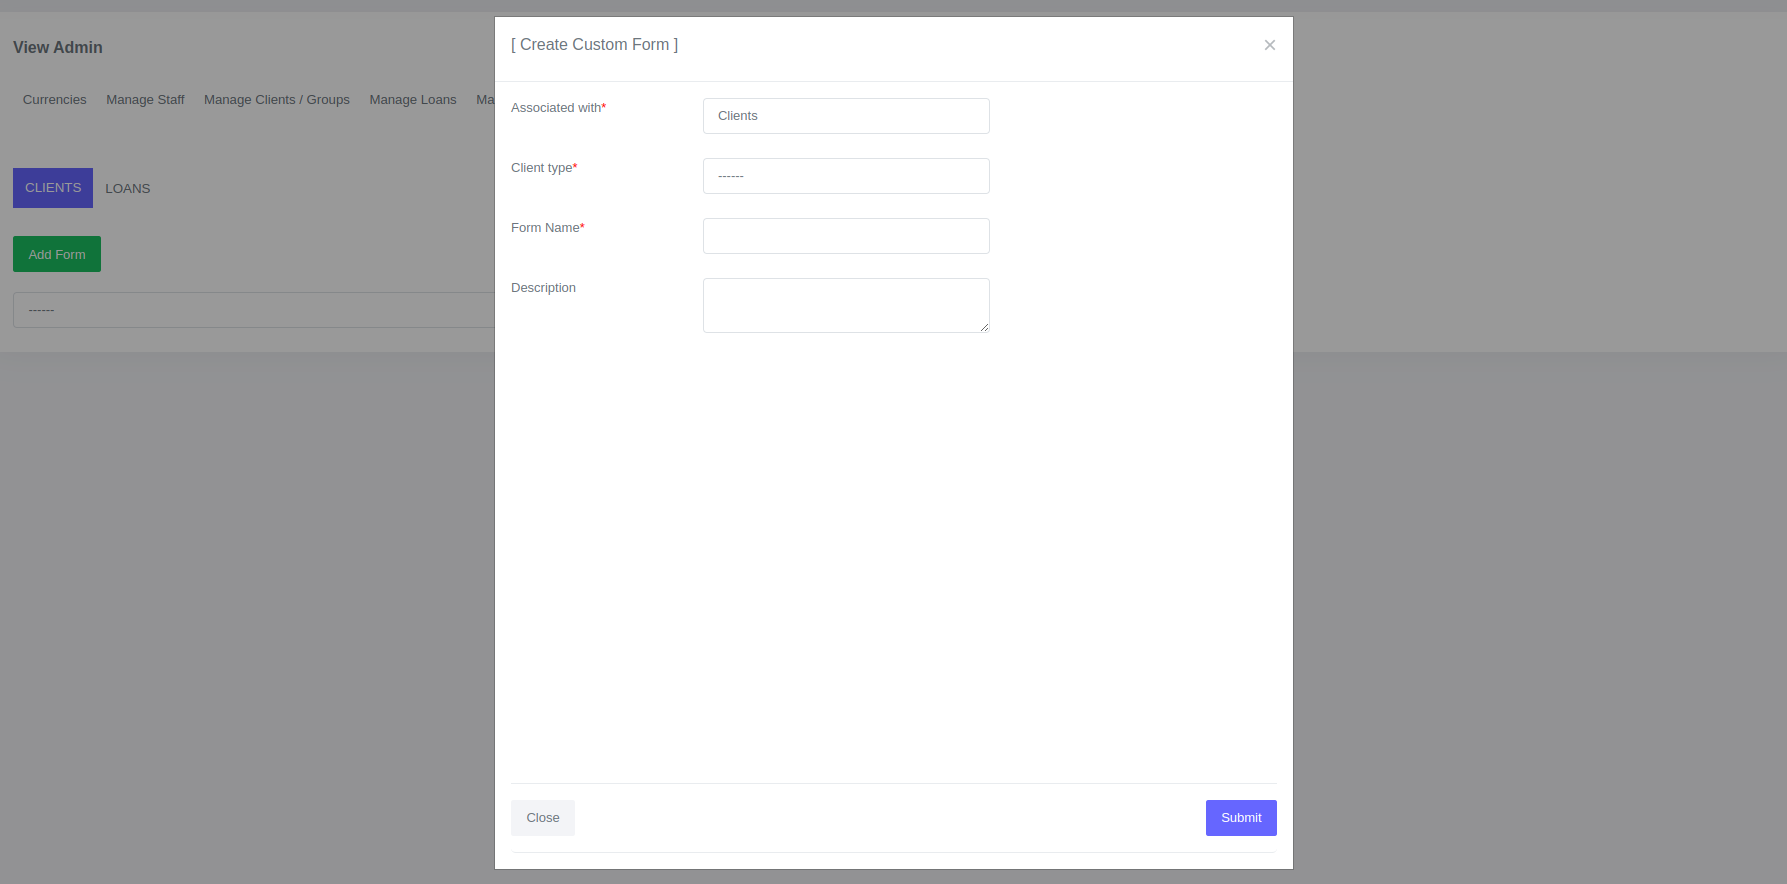
- Click submit
Fields for client entity custom form:
| Field | Description |
|---|---|
| Associated with | Entity assocaited with the form. |
| Client type | Client type associated with the custom form |
| Form name | Name of the custom form |
| Description | descriptive information about the custom form |
Fields for loan entity custom form:
| Field | Description |
|---|---|
| Name | Branch name |
| Associated with | Entity assocaited with the form. |
| Form name | Name of the custom form |
| Description | descriptive information about the custom form |
Custom fields creation
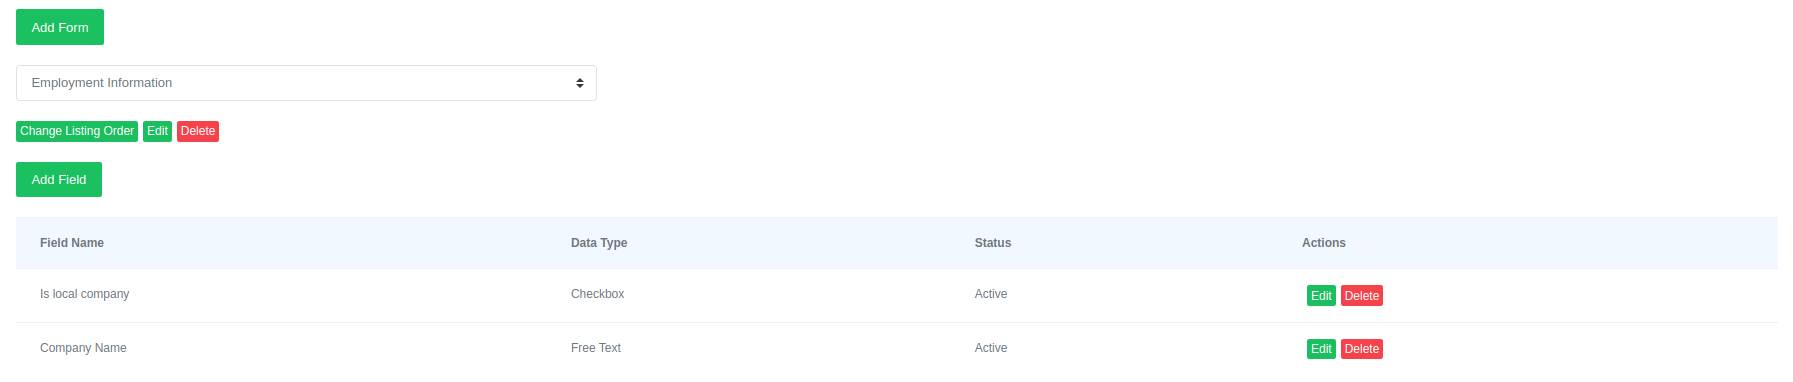
To add custom fields to a custom form, you must first create the form. Once the form is created, you can select it and add the custom fields. For example, we created a custom form named "Employment Information" to collect additional information about the client.

To add custom fields to the form:
- Click the "Add Field" button.
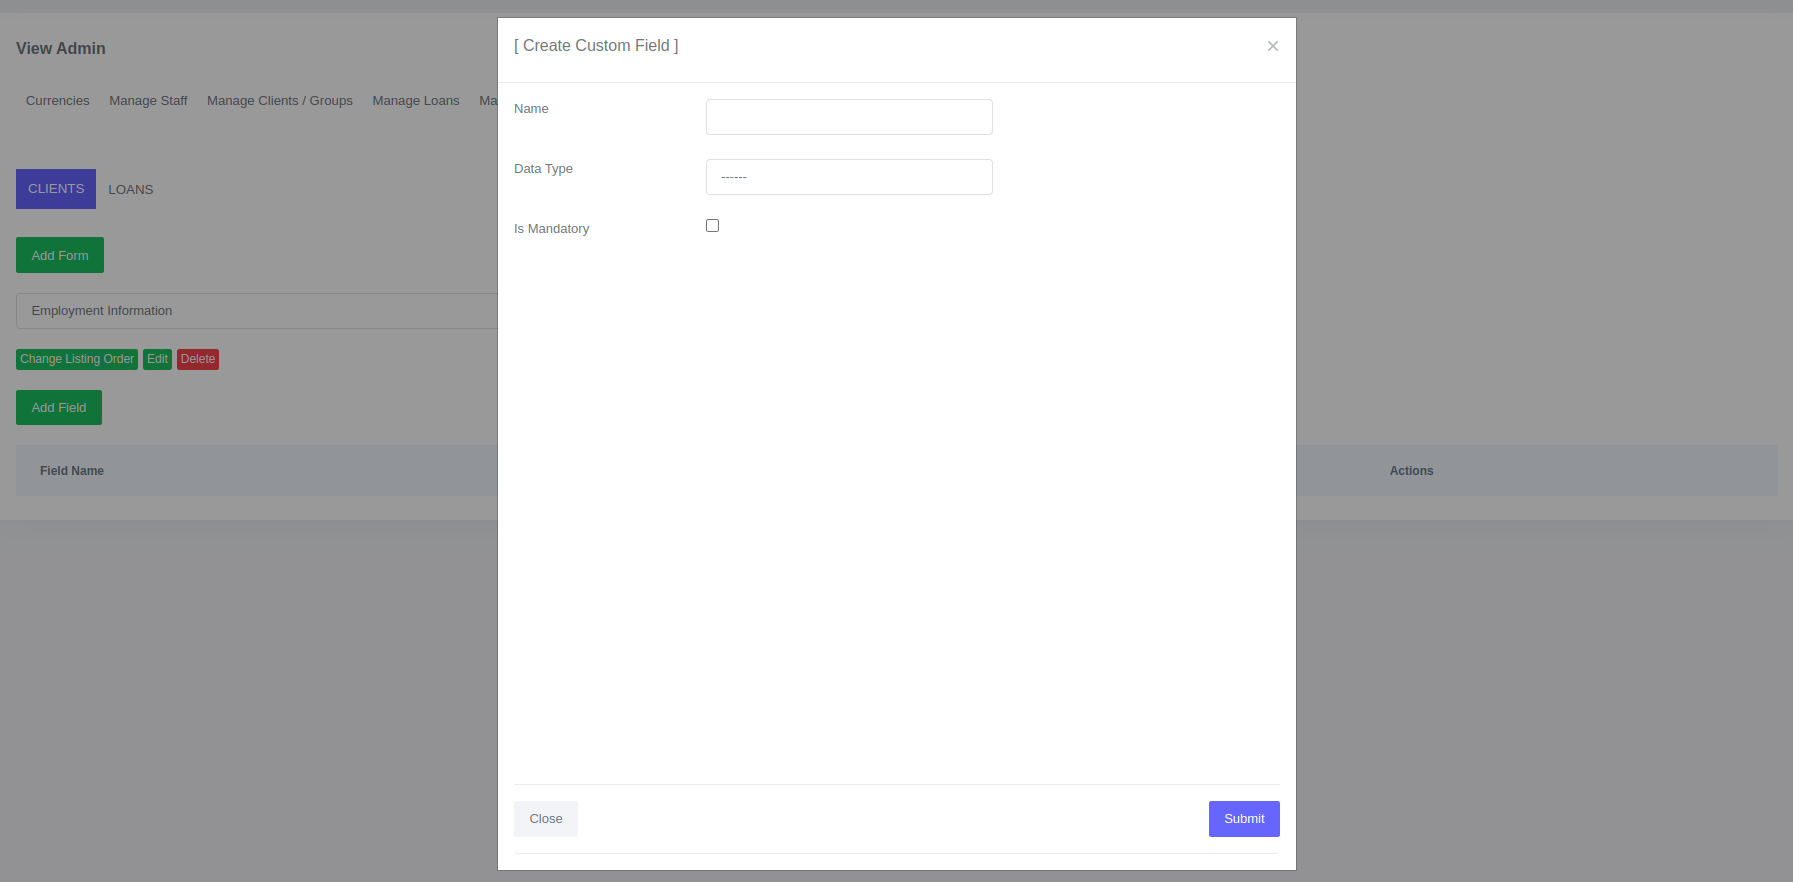
- A form will be opened for you to fill out.
- Click submit
We created two custom fields for our "Employment Information" custom form: "Company Name," which is a free text field, and "Is local company," which is a checkbox. When a user adds a client, a section named "Employment Information" will be added to the "Add Client" form, and it will include the "Company Name" and "Is local company" fields.
Not all "Add client" forms will have the "Employment Information" custom form. Only the forms with the client type that is configured to have the custom form will have it.
Fields for custom field:
| Field | Description |
|---|---|
| Name | Custom field name. |
| Data type | Custom field data type e.g free text, select, integer, decimal, checkbox, date, client, group or user |
| Is Mandatory | Is the custom field optional or mandatory |
Editing and deleting custom forms and fields
To edit custom form:
- Go to Admin > Manage Forms.
- To edit client entity, Click the "Clients" tab or "Loans" tab to edit loan entity custom form.
- Select the custom form you want to edit.

- Click the "Edit" button, a form will be opened for you to edit.
- Click Submit
To delete custom form:
- Go to Admin > Manage Forms.
- To delete client entity, Click the "Clients" tab or "Loans" tab to delete loan entity custom form.
- Select the custom form you want to delete.
- Click the "Delete" button. A confirmation dialog box will appear. Click "Delete" in the dialog box to confirm the deletion.
Custom forms that are already in use cannot be deleted.
To edit custom field:
- Go to Admin > Manage Forms.
- To edit custom field, Click the "Clients" tab or "Loans" tab of the custom form with the custom fields you want to edit.
- Select the custom form.
- Click the "Edit" button of the custom field you want to edit, a form will be opened for you to edit.
- Click Submit
To delete custom field:
-
Go to Admin > Manage Forms.
-
To delete custom field, Click the "Clients" tab or "Loans" tab of the custom form with the custom fields you want to delete.
-
Select the custom form.
-
Click the "Delete" button of the custom field you want to delete. A confirmation dialog box will appear. Click "Delete" in the dialog box to confirm the deletion.
Custom fields that are already in use cannot be deleted.
Changing custom fields listing order
The order in which custom fields appear in a form is determined by the order in which they are listed in the custom fields table. For example, on the "Employment Information" custom form, the order of the custom fields is "Is local company" followed by "Company Name." This means that when data is entered into the system, the "Is local company" field will be entered before the "Company Name" field. A user can change this order.
Any action in the system requires permissions. For more information, see Roles and Permissions.
To change custom fields listing order:
- Go to Admin > Manage Forms.
- To change custom fields listing order for client entity, Click the "Clients" tab or "Loans" tab for loan entity.
- Select the custom form of the custom fields you want to change.
- Click the "Change Listing Order" button, a form will be opened for you to edit.
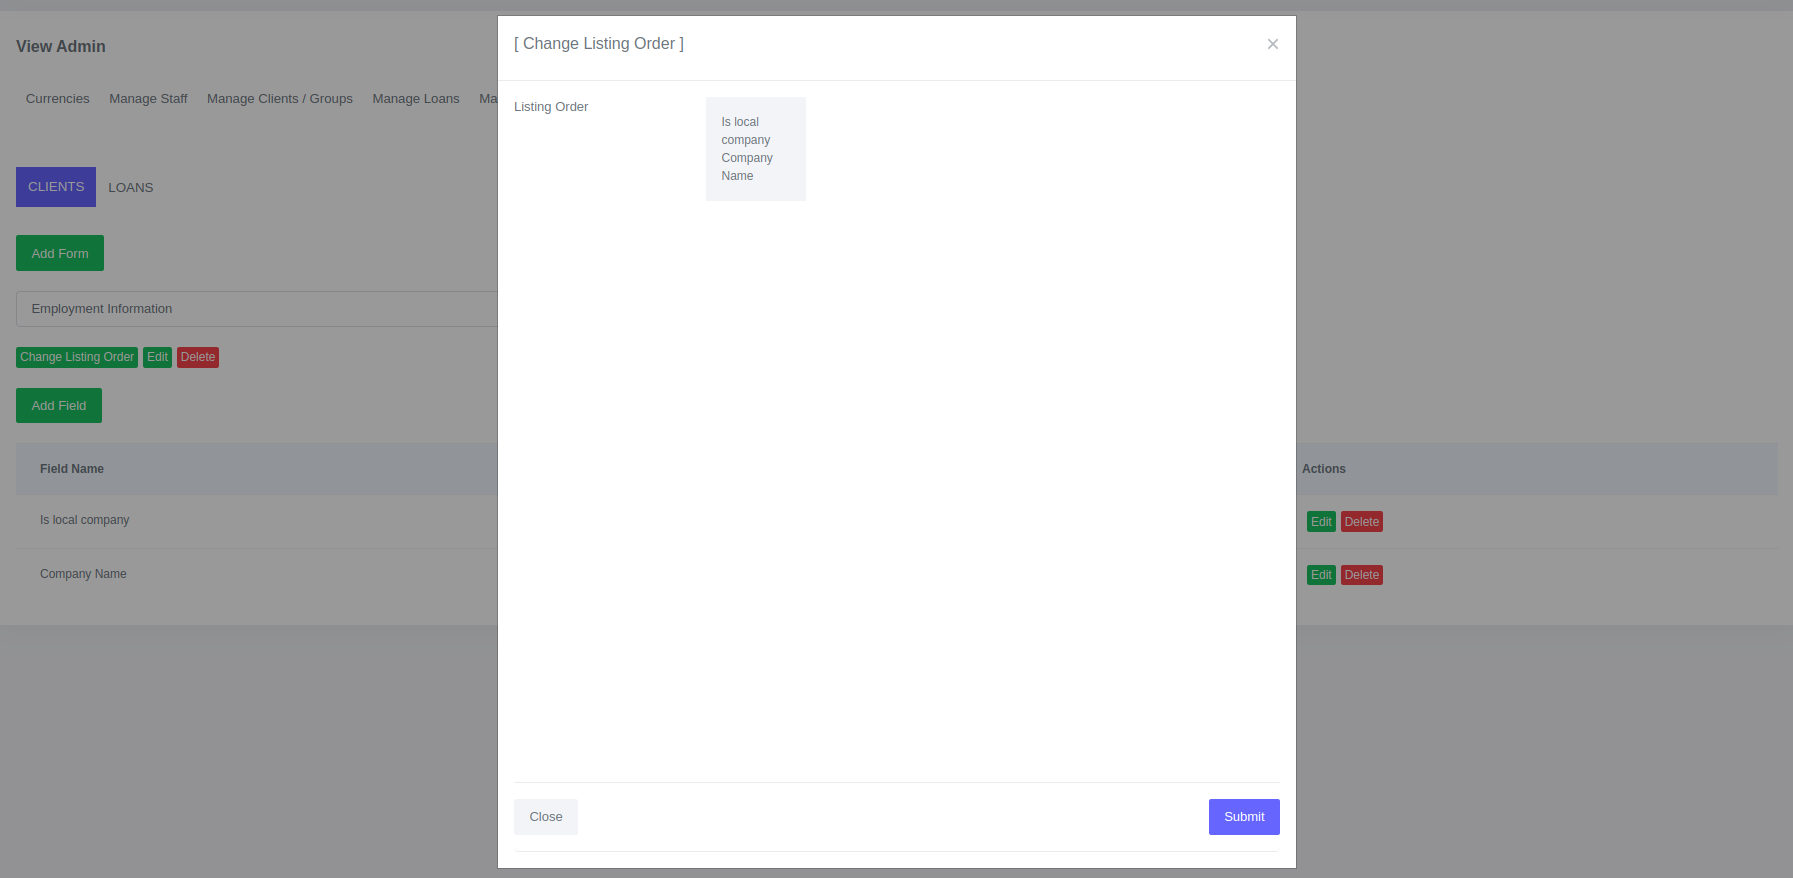
- Interchange the fields on this form in any way you want and click submit.